3D Illustrated Periodic Table Model Assembly
Replacement for the
Printed Assembly Notes of the model kit
START Putting the AAE Together
Needed: 5 large wire paperclips, scissors, a short pencil, glossy finish transparent Scotch tape (matte finish tape shows badly).Light coming from behind over your shoulder will help light the model at the end of the assembly, when working black on black with clear tape.
CLICK ON PHOTO
TO ENLARGE

1. Take all paper kit parts from the sleeve.
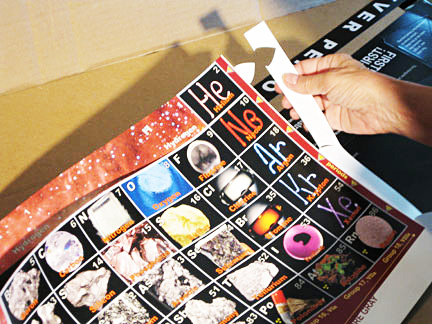
2. Separate carefully at the cuts for smoother edges of the model.

3a. Punch out 3 chads by Group 1
3b. Punch out 2 chads between 2 & 3
3c. Punch out chads along the bottom

4. Roll up the Hydrogen strip for safety
1. Remove contents of sleeve.
2. Separate all die-cut sections
Save the 3D periodic table sketches, the de Chancourtois material, and the photos (for reference) of various views of the model.
Put aside all except the 2 sections with element data/photo boxes.
Put the small section aside and place the larger section - the s-, d-, and p-blocks - element photo side up.
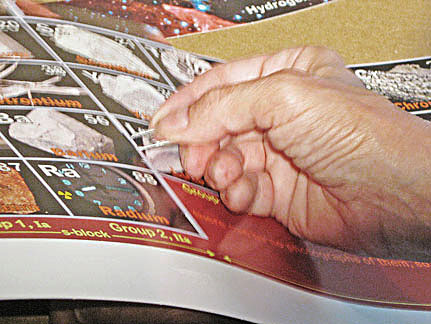
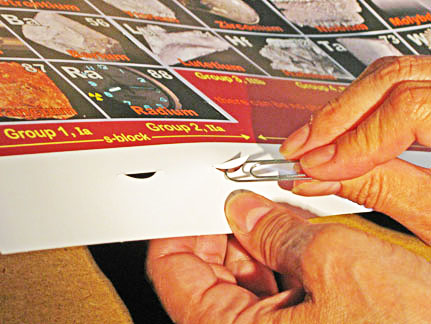
Punch out, with a paperclip, the small center 'crescent shaped' chads in the vertical slots as follows:
3a. by the fold crease at the beginning of the periods at Group 1; near Beryllium on the left end of the Hydrogen strip; and at the small flap crease next to Boron
3b. ...also low on the interface between the Groups 2 & 3
3c. ...and from horizontal slots in the bottom white strip where there are (sometimes multiple) slots under groups 1, 2, 3, 4, 11, and 12.
4. Roll the extended Hydrogen strip up to about a 3" to 4" diameter and paperclip it together - front and back - above Fluorine, and turn the whole section over, black side up, bottom toward you.
NEXT - F-block Pinch ->>
Any problems? Call the AAE HELPLINE at 773.271.0318 days
...or
email me at Roy@AlexanderArrangementofElements.com.
< BACK